For our assessment week, we were tasked with creating something that takes inspiration from Tolkien’s The Lord of the Rings books at first I thought of creating the ring but then came to realise it would be too simple and so I decided by creating a Hobbit hole instead.
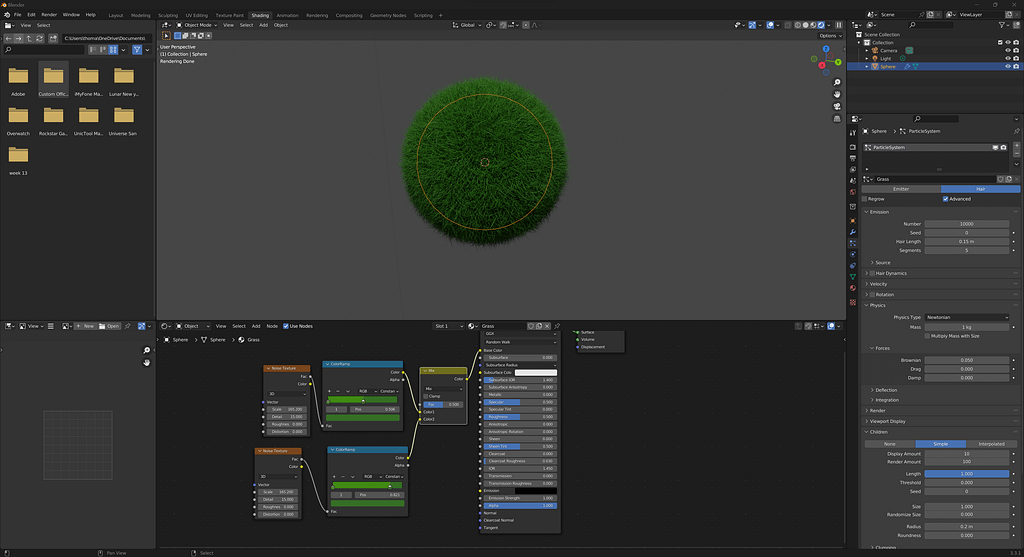
The first thing I began doing was going through tutorials to help me with the process. I first found a tutorial on how to make grass and it was extremely useful and very realistic. Below is the link as well as a screenshot of what the grass looks like within blender
for the next lesson I started by making a simple creation of a hobbit hole> I loosely followed the video below to get a basic structure which I would then adapt to my liking. It proved to be extremely useful and helped me understand more about blender than I had done before starting this assessment week.
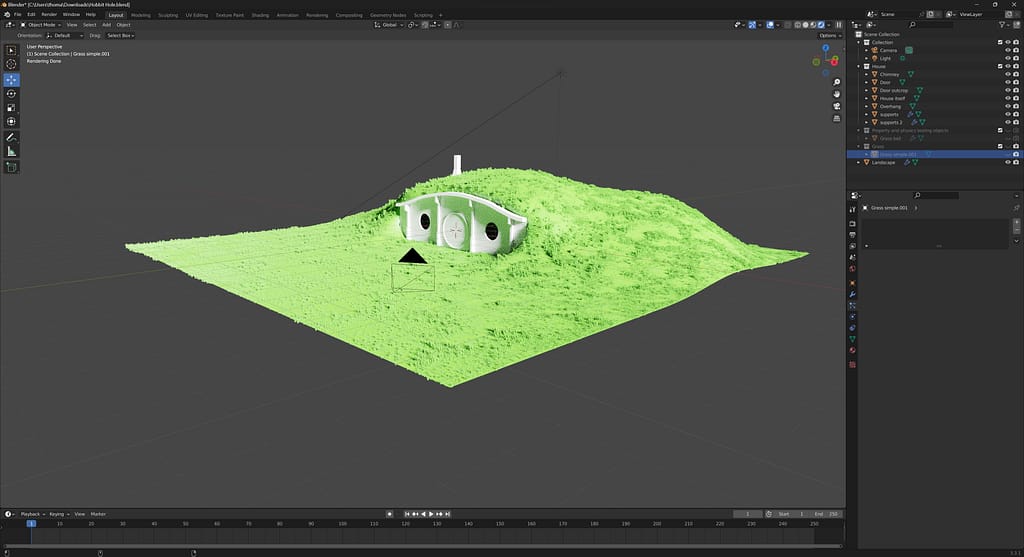
For the beginning of my lessons on Thursday, I began by creating the landscape that would serve as a basic overview of what it looks like so far. I knew that in the future I would change and alter it but I just needed to make sure that it looked natural. I used the sculpt and mirror tool to ensure a symmetrical hill and to make it feel more carved out and align with the house itself. Below is my landscape with the grass particle I created. In my opinion, I believe it went reallly well but the features such as the grass could be improved on

Whilst improving on the landscape I decided to create my own texture of grass which would allow me to edit the strands properly and allow me to have a more customisable landscape. below is a photo of the landscape whilst using my customised grass. I believe it looks slightly better than the landscape before as it isn’t completely layered with grass but instead it has blank areas which would be common in real life.
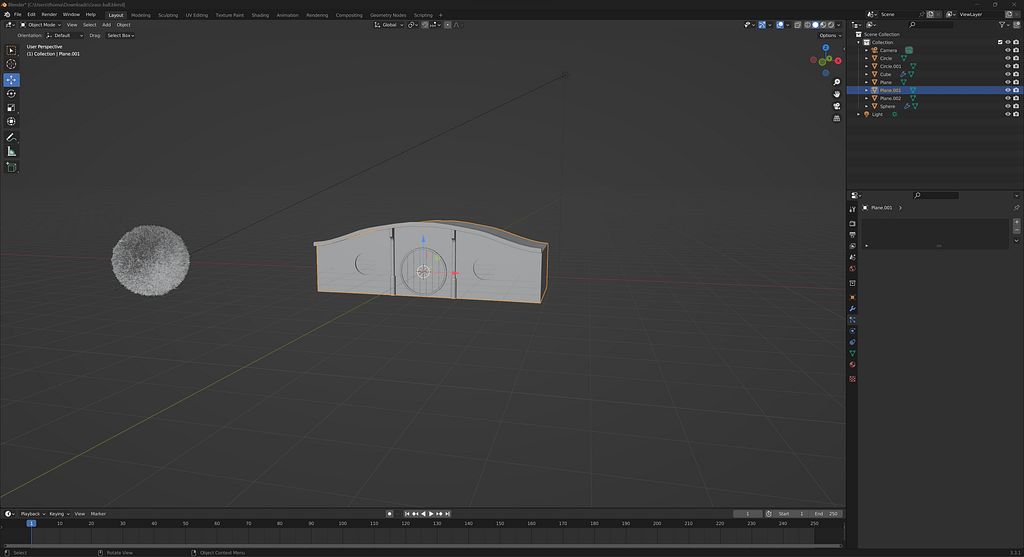
Next, I began working on the textures. I started with the door and the wooden beams as my prior knowledge of wooden textures would make this the easiest part to do first. Then I began working on the terracotta walling of the house which would provide for a high quality, realistic look for the house itself. The video below provided extremely useful in creating the terracotta walls below is my progress on the texturing of the hobbit house.
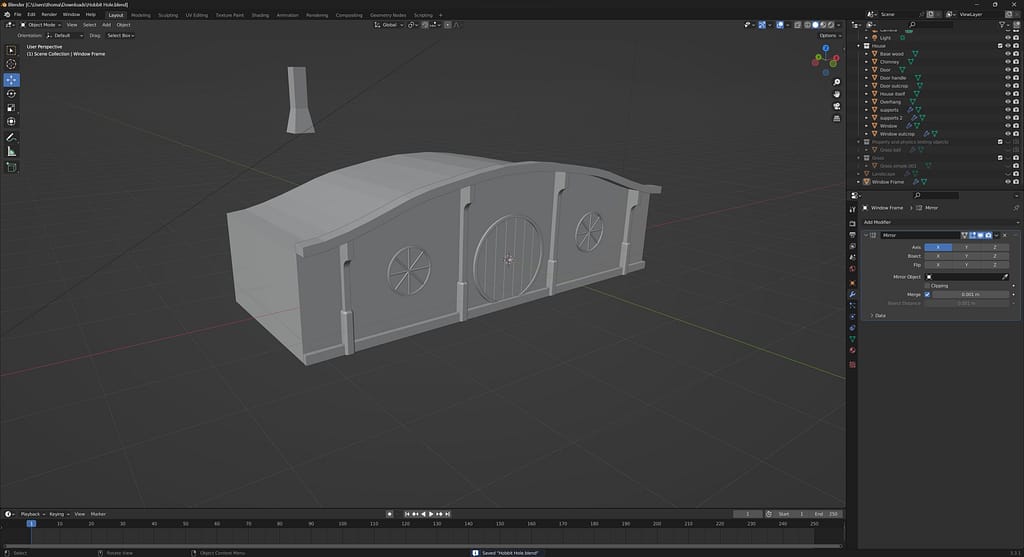
Finally, I began adding the final touches such as the window frames to the house before I’d go on to work on the landscape a bit more. I went with a traditional style that suited the hobbit hosue quite well. below is a photo of the frames before being rendered.
I then added a pathway to the house and followed the video below on how to make a stone texture. Afterwards it came out really well and fits with the design of the build itself.
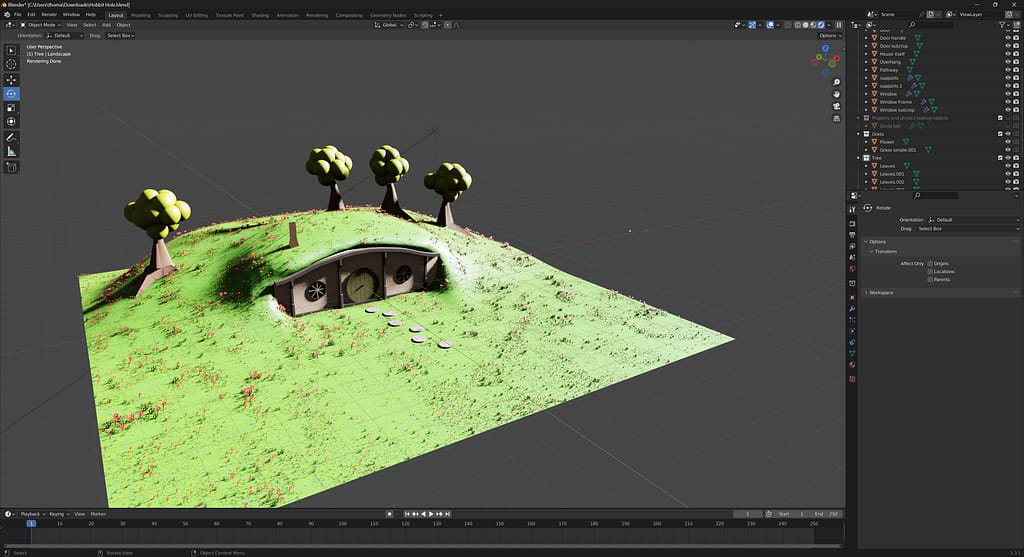
finally, I added in some flowers to the grass terrain as well as some low poly trees that would go into the background just to provide a bit more quality of life within the 3D render. below is my unrendered screenshot of the product so far
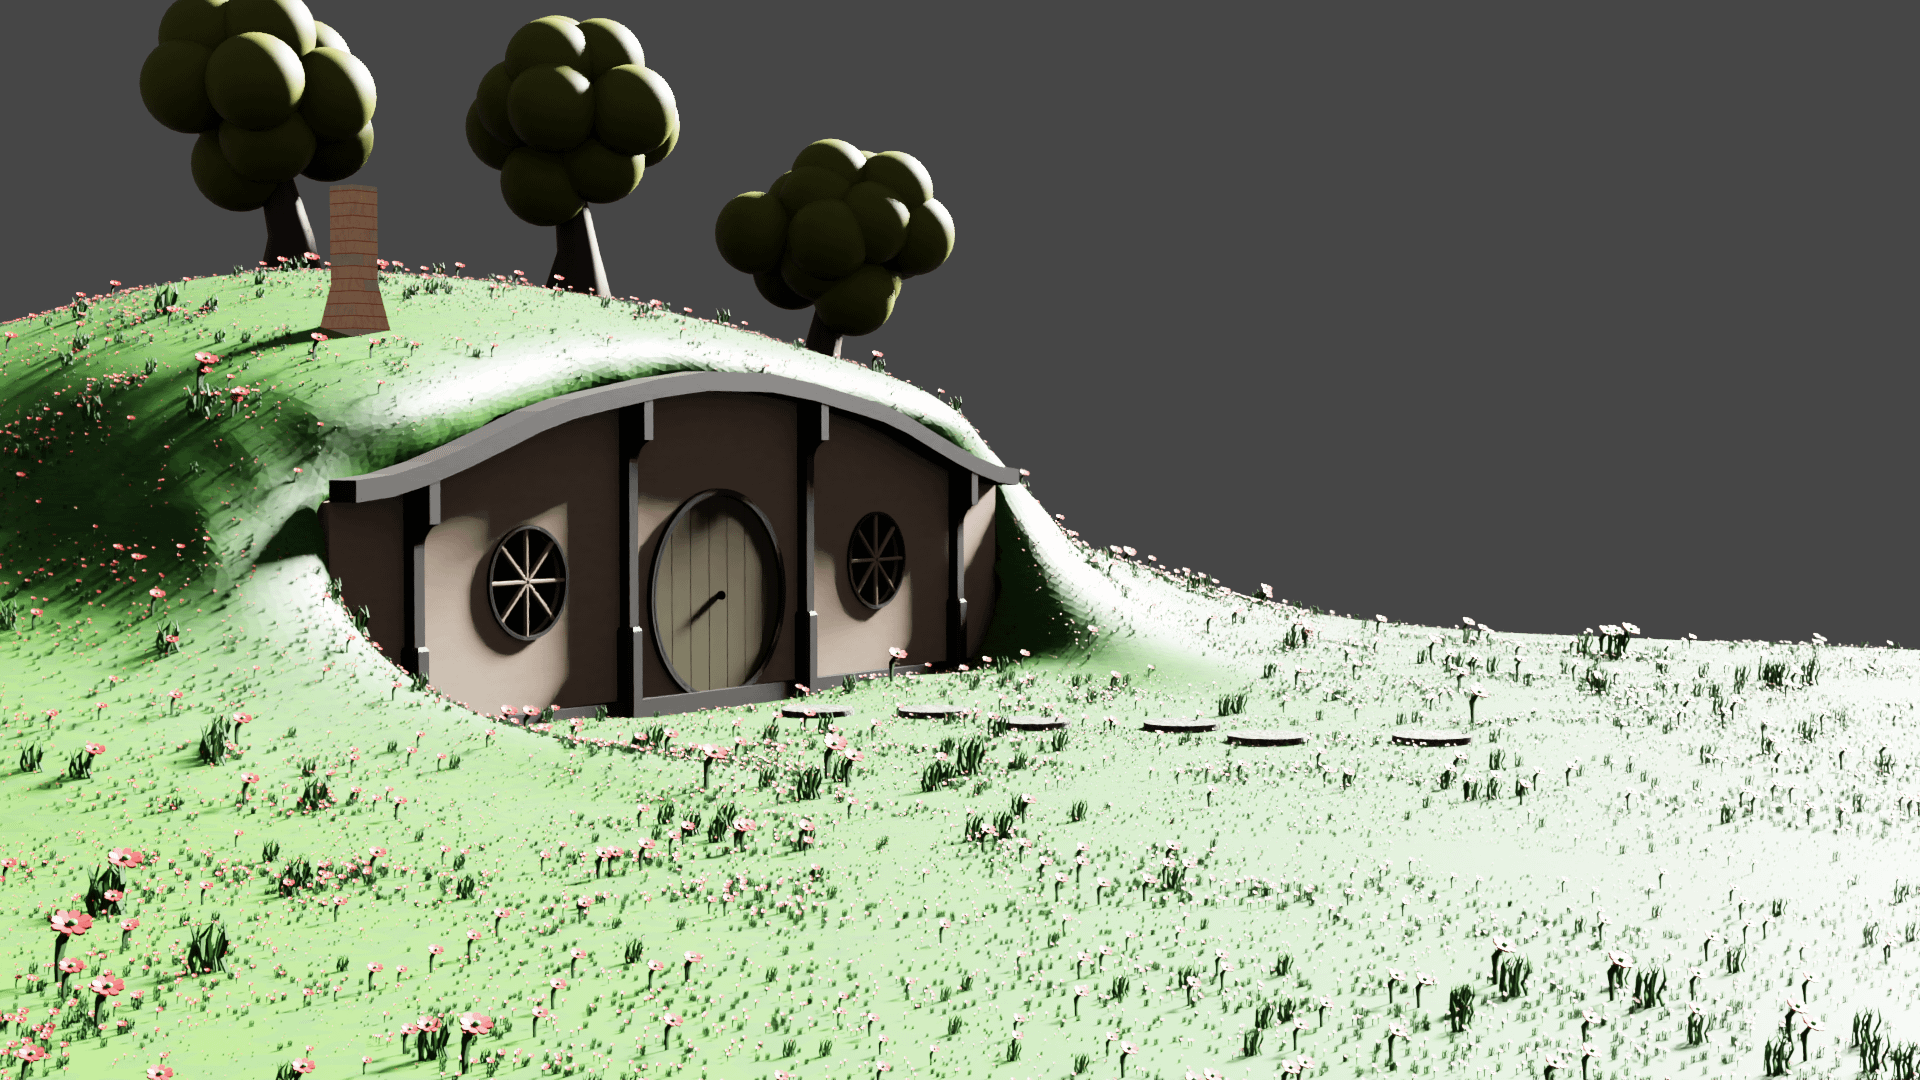
Once the product was completed I rendered it out and below is my final submission for my assessment week based around The Lord of the Rings.
